How to Prepare Quilt Backing Fabric for Professional Longarm Quilting
Expert longarm quilter shares 19 years of experience preparing quilt backing fabric. Avoid costly mistakes with professional tips, sizing guides & fabric choices.
Getting your quilt backing ready for longarm quilting can make the difference between a professional-looking finished quilt and a complete disaster. I've been involved in the quilting business for 19 years and have been longarm quilting for 5 years. In that time, I've made over 200 quilts and quilted over 500 quilts. Trust me when I say I've seen every backing preparation mistake you can imagine – and I've learned from each one.
Just last week, a customer brought me a beautiful Dresden Plate quilt top with backing that was exactly the same size as the quilt top. No overhang at all. When I explained we needed at least 6 inches extra on all sides, she looked at me like I was trying to sell her more fabric! But here's the thing: proper backing preparation isn't optional if you want professional results.
Whether you're working with a longarm quilter for the first time or you're an experienced quilter who wants to make sure you're doing everything right, I'm going to share what I've learned from 19 years in the quilting business – including the mistakes that will cost you time and money.
Why Cotton Backing Fabric Works Best (From Someone Who's Seen It All)
Cotton remains my top recommendation for quilt backing, and I'm not just repeating what everyone else says. In my 5 years of longarm quilting, I've worked with every backing material you can think of – cotton, polyester, flannel, cuddle fabrics, and yes, even bedsheets (more on that later).
Here's what I've learned: Cotton consistently gives me the best results on my longarm machine. The tension stays even, the needle glides through smoothly, and the finished quilts lay flat.
I'll never forget the quilt that taught me this lesson. A customer brought me a gorgeous hand-pieced sampler quilt – probably 200 hours of work – with a polyester sheet as backing. She'd read online that sheets were "just as good and cheaper." The synthetic material kept shifting during quilting, creating tension issues that resulted in visible puckering across the entire quilt. We had to remove all the quilting and start over with proper cotton backing. That's a conversation I never want to have with a customer again. Sheets are meant for beds, not quilting!
My cotton backing preferences come from piecing nearly 200 personal and family quilt projects. It seems like everyone in my family has king-size beds with specific projects and fabrics they want. I should have bought a quilt shop!
Side note: I worked at a local quilt shop for approximately two years, where I probably quilted over 150 quilts working just 2 days a week while running the store. I have also been subcontracted by another quilt shop in town this past year because their longarm quilting machine has been down for repairs. Basically, I sleep and quilt.
My Cotton Backing Recommendations:
- For everyday quilts: High-quality quilting cotton in 108" width
- For baby quilts: Prewashed cotton flannel – soft but still manageable, or a quality cuddle fabric
- For wall hangings: Cotton sateen when you want a subtle sheen
Pro tip from my studio: I always keep a personal stash of neutral cotton backing in 108" width. When customers bring me tops with inadequate backing, I can offer them quality alternatives right away instead of delaying their project.
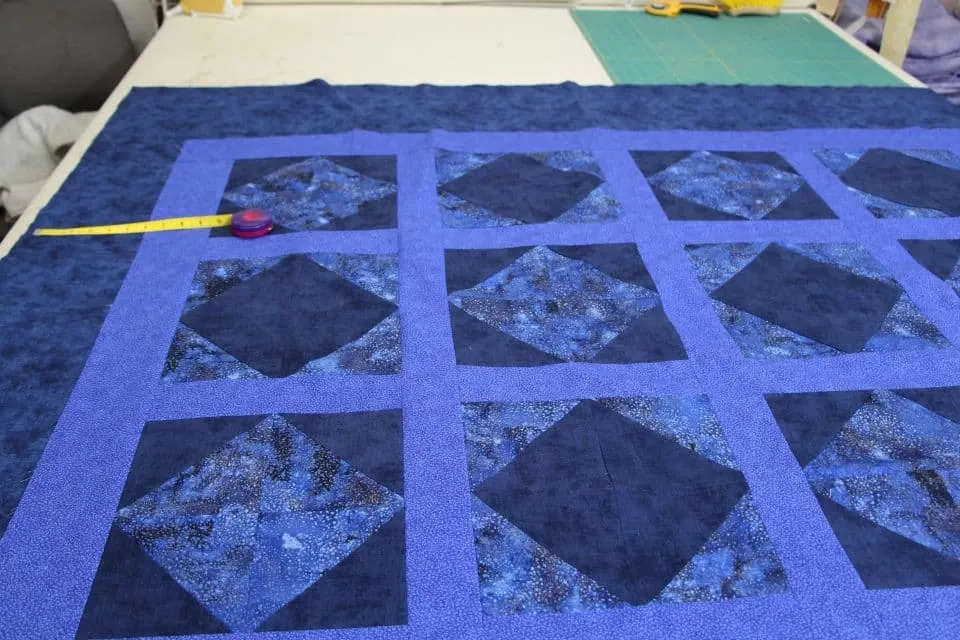
The 6-8 Inch Rule (And Why I'm So Strict About It)
I used to be more flexible about backing measurements when I first started my business. Big mistake. Now I have a strict rule: your backing fabric must extend 6-8 inches beyond your quilt top on all sides, and I won't load a quilt without proper overhang. Sewing on leaders is no fun and it is costly to the client. I have had to cut a client's quilt top down at their request to make it work.
Here's why I learned to be strict: About 3 years ago, a customer convinced me to work with backing that only had 4 inches of overhang. "It should be fine," she said. Halfway through quilting, the backing pulled loose from the frame, creating a diagonal pucker across her queen-size quilt. We had to remove everything and start over. That was a significant issue. Gammill longarms have take-up bars that are 4 inches in diameter, which means you require extra fabric to load. Client quilts are not always square and can be out as much as two inches sometimes.
My Current Studio Requirements:
- Lap quilts (up to 60" x 80"): 72" x 92" backing minimum
- Queen quilts (90" x 108"): 102" x 120" backing minimum
- King quilts: I require 108" backing width – no exceptions
The math is simple, but I see customers get it wrong constantly. If your quilt top is 60" x 80", you need backing that's AT LEAST 72" x 92". I actually recommend going bigger – fabric is cheaper than remaking a quilt.
Customer story: Last month, Jennifer brought me a quilt top that measured 65" x 85". She'd purchased exactly 65" x 85" of backing fabric. When I explained she needed 77" x 97", she initially balked at buying more fabric. But after I showed her photos of quilts ruined by inadequate backing, she understood. Her finished quilt turned out perfectly, and she's become one of my best referral sources.
When You Have to Piece Backing (My Professional Approach)
I'll be honest – I prefer 108" backing whenever possible. It saves me time, gives you better results, and eliminates potential problems. But I understand that budget and availability sometimes make piecing necessary. Over the years, I've developed a system that ensures pieced backing works beautifully.
My Piecing Requirements (learned through trial and error):
- Horizontal seams only: I learned this from a customer's mistake. She'd pieced her backing with vertical seams, and they created tension lines that showed through the quilting. Horizontal seams distribute stress better and are less likely to pucker. Additionally, it is easier to keep the seam in the center of the quilt back.
- 1-inch seam allowances: I know most quilting uses ¼-inch seams, but backing needs to be stronger. I discovered this when a customer's ½-inch seams pulled apart during the quilting process. Now I require 1-inch seams on all pieced backing. This year, I have been checking to ensure customers have backstitched their seams as well. Nothing like having to sew a customer's seam on the longarm that just pulled apart.
- Press seams open, not to one side: This was a game-changer for me. Pressing seams to one side creates bulk that shows up in the quilting. I actually provide this service for customers who aren't sure how to do it properly.
My Favorite Piecing Layout for Budget-Conscious Customers:
- Buy 3 yards of 44" cotton backing fabric
- Cut into two 54" pieces
- Sew together with 1" seam allowance, pressed open
- Result: approximately 44" x 107" backing (perfect for lap quilts)
Piecing mistake I see constantly: Customers trying to piece backing with fabric scraps. I had one customer bring me backing pieced from 12 different fabrics – all different weights and fiber contents. The tension variations were impossible to manage. Stick to the same fabric for pieced backing, or minimize the number of fabrics and use fabrics of the same weight.
My Studio Requirements (What I Need From You)
I've learned that clear communication prevents problems. First, you fill out a quilting intake form. Here's exactly what I need from customers to ensure your quilt turns out perfectly:
Preparation Requirements:
- Backing 6-8 inches larger on all sides (I measure every quilt when you drop it off)
- Square backing with straight edges (I have a large cutting table if you need help)
- No pins in the quilt top or backing (they damage my machine)
- Clean, pressed fabrics (I offer pressing service for $15.00 if needed)
What I Check During Drop-Off:
- Measurements: I measure both your quilt top and backing to confirm adequate overhang
- Fabric condition: Looking for tears, stains, or excessive wrinkles, informing you that there will be a pressing charge
- Construction quality: Checking that seams are secure and edges are straight
- Special requirements: Discussing thread choices, quilting density, and timeline
My "Problem Prevention" Checklist (developed after too many difficult conversations):
- Is the backing fabric appropriate for longarm quilting?
- Are all measurements adequate with proper overhang?
- Is the customer's timeline realistic for their project complexity?
- Have we discussed thread choices and quilting design options?
Customer communication that works: I always text photos during the quilting process. Last week, I caught a potential problem with thread color that looked different under my studio lights. A quick text to the customer saved us both from disappointment.
My guarantee: If your backing is properly prepared according to these guidelines, I guarantee professional results. If I make a mistake due to my error, I'll make it right at no charge. But if the backing wasn't prepared correctly, we'll need to discuss options and additional costs.
Questions I Get Asked Every Week
"Can I use this vintage sheet I found for backing?"
Short answer: Please don't. I know vintage sheets seem perfect – they're wide, soft, and often beautiful. But I learned the hard way that most sheets aren't suitable for longarm quilting.
What happened: A customer brought me her grandmother's 1940s sheet for backing. It was gorgeous and had sentimental value. But the thread count was so high that my needle kept getting gummed up, and the fabric was too tightly woven for even quilting stitches. We ended up using it as a design element on the front instead.
Exceptions: Modern cotton sheets with lower thread counts (200-300) can sometimes work, but I always test a sample first.
"How much will backing shrinkage affect my quilt?"
This question usually comes after they've already bought the fabric. Here's what I've learned about shrinkage:
Cotton backing typically shrinks 3-5% in both directions. For a 90" x 108" backing, that's potentially 3-5 inches of shrinkage. I had one customer's backing shrink so much that it ended up smaller than her quilt top.
My recommendation: Always buy 10% extra backing fabric to account for shrinkage, cutting errors, and future repairs.
"Why won't you work with my flannel backing?"
I actually love flannel backing when it's done right. The problem is that most customers don't prepare it properly. Flannel stretches more than cotton, so I need extra stabilization time, and it requires different tension settings on my machine.
My Flannel Backing Requirements:
- Must be prewashed and completely dry
- Needs an extra 2 inches of overhang (8-10 inches total)
- I charge an additional fee for flannel due to extra handling time
- Some complex quilting patterns don't work well with stretchy backing
"Can you fix backing that's too small?"
This breaks my heart because it's usually fixable, but expensive. Options include:
- Add a border to the backing (works if you need 6 inches or less)
- Piece in additional fabric (I charge by the hour for this service)
- Start over with new backing (often the most cost-effective option)
Prevention is cheaper than fixing: Double-check your measurements before cutting backing fabric.
Ready to Create Something Beautiful Together?
After 19 years of quilting, I still get excited about every project that comes into my studio. There's something magical about taking a quilt top that represents hours of careful piecing and transforming it into a finished heirloom through quilting. I absolutely love my clients' expressions when they pick up their quilts.
Proper backing preparation is where that magic begins. When you follow these guidelines, you're setting us both up for success. I can focus on making your quilting design perfect instead of wrestling with preparation problems.
Questions about your specific project? I offer free consultations because I'd rather spend 10 minutes answering questions upfront than dealing with problems later. Schedule Your Free Consultation - Call 480-510-8025 or stop by the studio Monday through Friday, 10:00 am - 4:30 pm.
Ready to get started? Here's what happens next:
- Prepare your backing using the guidelines above
- Schedule your drop-off appointment (I block 30 minutes to review each project)
- We'll discuss quilting options and establish a timeline that works for both of us
I'm here to make your quilting dreams come true – let's make sure we start with a solid foundation.
Join Our Newsletter for More Tips
Deborah Rogers, Owner/Operator
Deb's Quilt Studio Longarm Quilting
Local customers & Mail-Order Customers
358 W. Casa Linda Dr # 553
Taylor, Arizona 85939
"Turning your pieced tops into family treasures since 2006"