Transform Your Memories: The Complete T-Shirt Quilt Guide
Transform your cherished t-shirts into a beautiful memory quilt that tells your life's story. From concert tees to race shirts, learn how to turn meaningful garments into a cozy, personalized keepsake with our complete guide.
Do you have a drawer bursting with t-shirts that tell your life's story? That concert tee from your favorite band, the race shirt from your first 5K, your college homecoming shirt, or jerseys from years of supporting your team? Instead of letting these memory-laden garments gather dust, why not transform them into something extraordinary: a personalized t-shirt quilt that you'll treasure forever.
T-shirt quilts are far more than cozy blankets. They're tangible storytellers, weaving together chapters of your life into one beautiful, functional piece of art. Each square represents a moment, an achievement, or a passion, creating a narrative tapestry that's uniquely yours.
Why T-Shirt Quilts Capture Hearts
The magic of t-shirt quilts lies in their deeply personal nature. Unlike traditional quilts that showcase patterns and coordinated fabrics, these quilts celebrate individuality and preserve precious memories. Here's what makes them so special:
Personal Storytelling: Every t-shirt carries its own story—from that family reunion in 2015 to your child's little league championship. Together, they create a visual autobiography that sparks conversations and memories.
Eco-Friendly Repurposing: Instead of contributing to textile waste, you're giving new life to clothing that might otherwise end up in landfills. It's sustainability with heart.
Custom Comfort: T-shirt fabric is naturally soft and comfortable, making these quilts perfect for snuggling on the couch, adding warmth to a bed, or creating a cozy reading nook.
Meaningful Gifts: Whether for graduation, retirement, or memorializing a loved one, t-shirt quilts make incredibly thoughtful presents that recipients will cherish for years.
Planning Your Memory Quilt: Setting Yourself Up for Success
The key to a stunning t-shirt quilt lies in thoughtful preparation. Taking time to plan ensures your finished quilt will be both beautiful and durable.
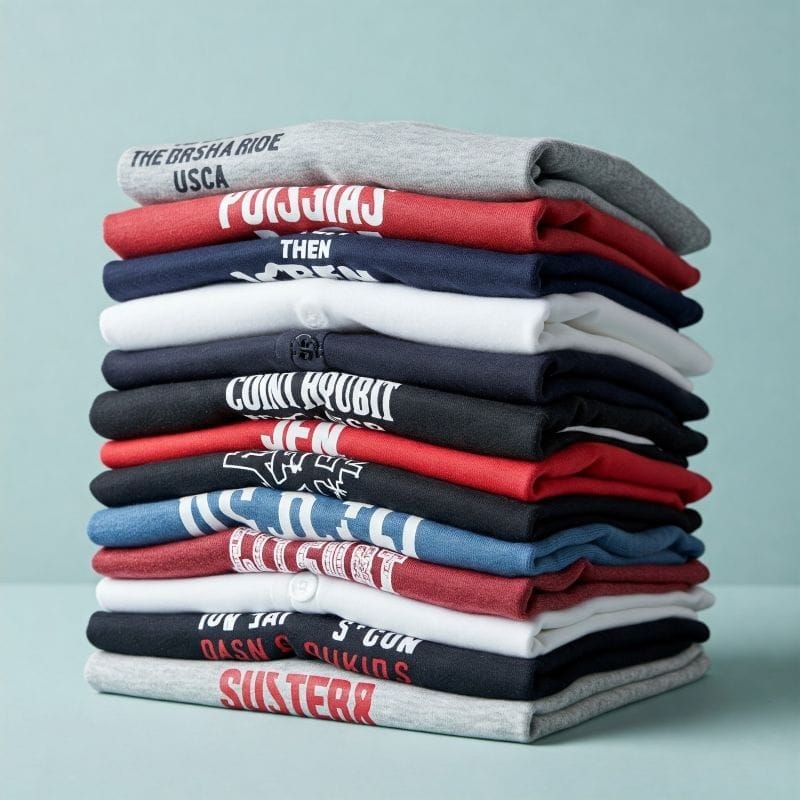
Curating Your T-Shirt Collection
Start by gathering every t-shirt you're considering for your quilt. Spread them out where you can see everything at once—your bed, living room floor, or a large table work perfectly.
As you review each shirt, ask yourself: Does this piece spark a memory worth preserving? Check for excessive wear, permanent stains, or holes that might compromise the quilt's durability. Don't worry about minor imperfections—they often add character and authenticity to your story.
Consider the visual balance of your collection. While you don't need perfect color coordination, aim for a mix that's pleasing to the eye. If you have many shirts in similar colors, consider interspersing them throughout the design rather than clustering them together.
Determining Size and Layout
Your quilt's intended purpose should guide its size. A throw quilt (approximately 50x60 inches) is perfect for couch snuggling, while a twin-size quilt (around 65x90 inches) works beautifully for a child's bed or wall display.
Before making any cuts, experiment with layouts. Arrange your t-shirts in different configurations, taking photos of arrangements you like. This visual planning helps you spot potential issues before you're committed to cutting fabric.
Consider the graphics on each shirt carefully. Some designs work better as focal points, while others complement beautifully as supporting elements. Make note of shirts with graphics that must be centered versus those with more flexible placement options.
Preparing Your Materials
Once you've finalized your selection, it's time to prep your t-shirts for transformation:
Wash and Dry: Even if shirts seem clean, wash them in warm water and dry completely. This pre-shrinks the fabric and ensures everything is truly clean.
Apply Interfacing: This step is crucial for success. T-shirt fabric is stretchy knit, which can distort during sewing. Apply medium-weight fusible interfacing to the back of each shirt section you'll be using¹. This stabilizes the fabric and prevents stretching during construction.
Press Smooth: Iron your shirts to remove wrinkles and create smooth cutting surfaces. This seemingly small step makes a significant difference in your final results.
Cutting and Construction: Bringing Your Vision to Life
Creating Uniform Squares
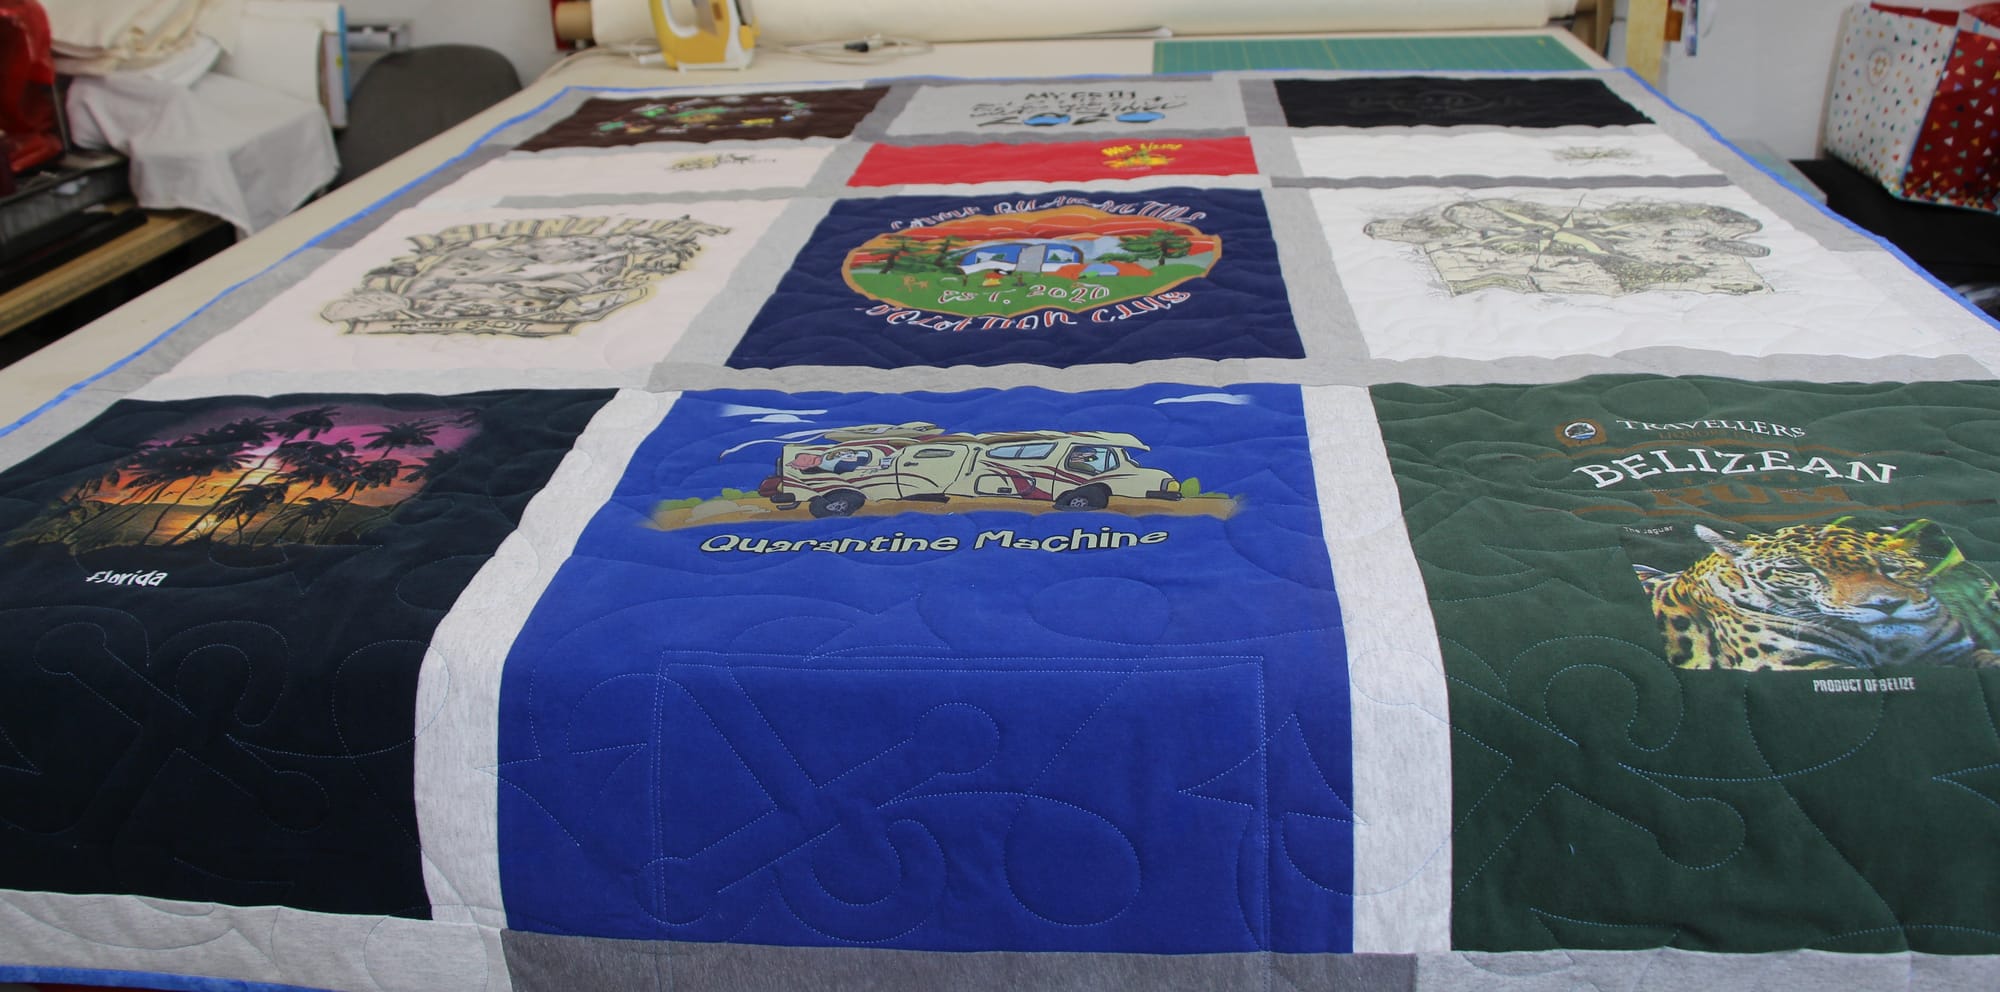
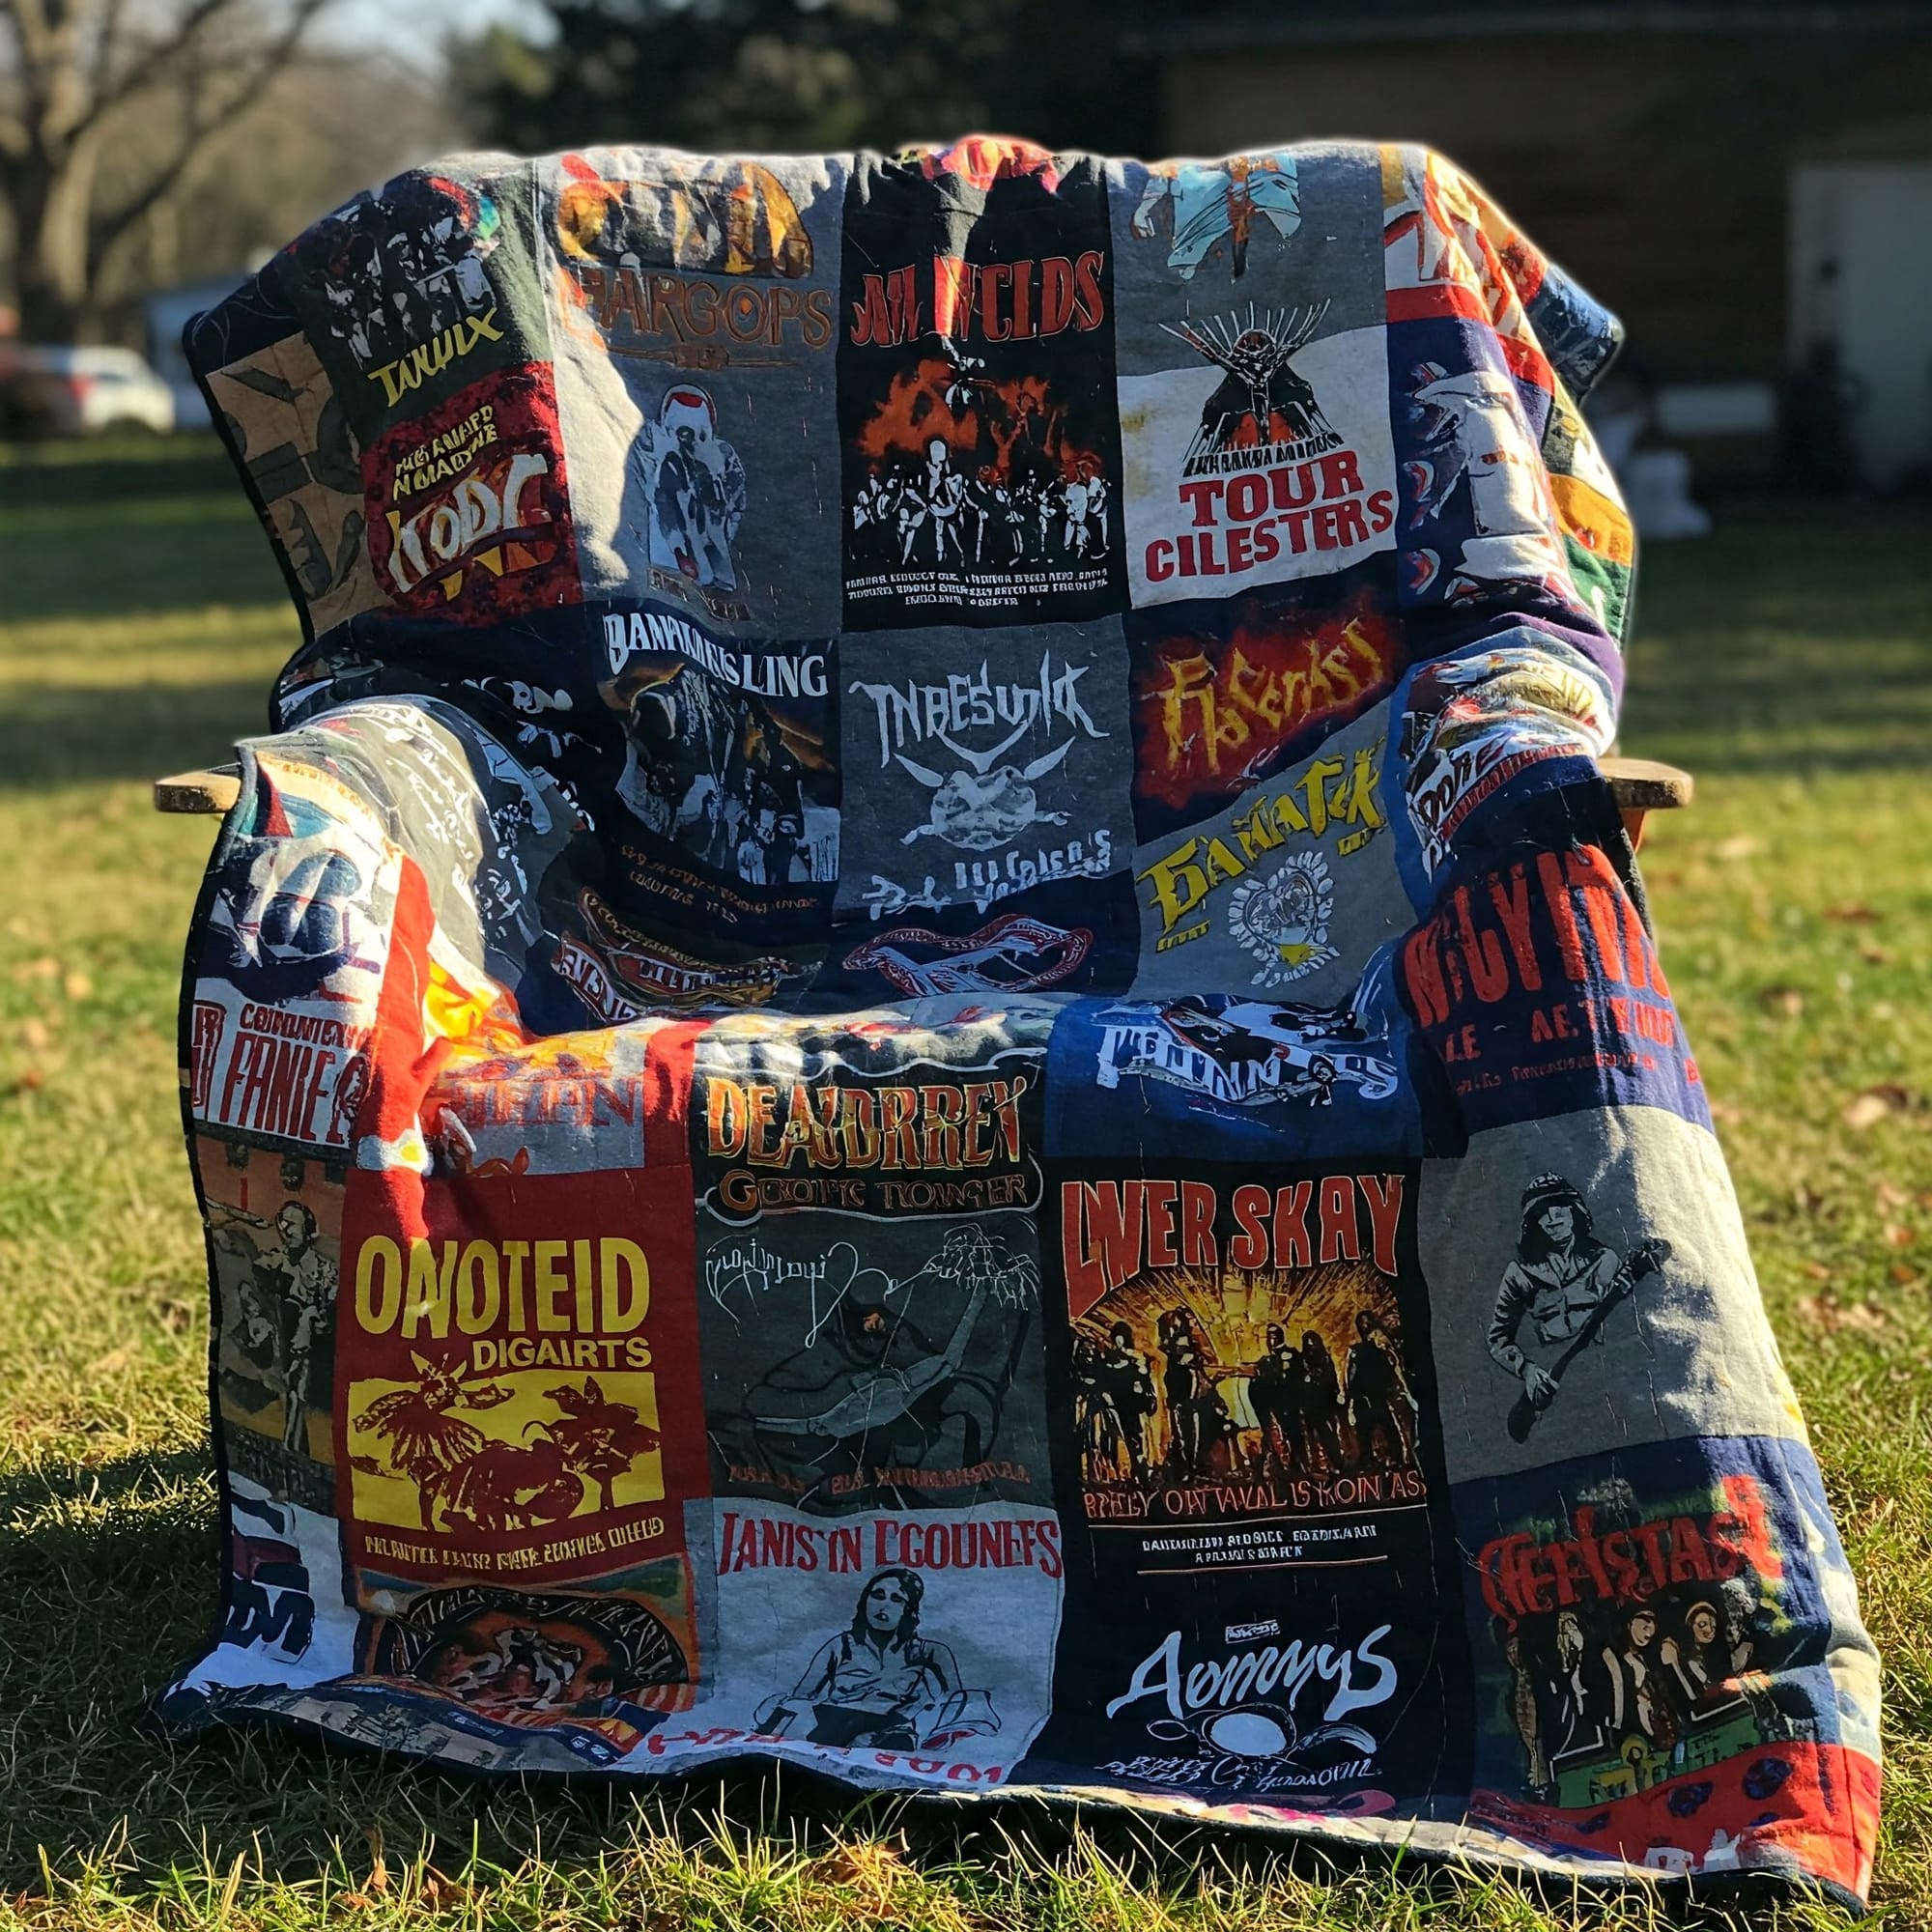
Consistency in cutting creates a professional-looking finished product. Use a rotary cutter, clear ruler, and self-healing mat for the most accurate cuts. Common square sizes include 12x12 inches or 15x15 inches, but choose what works best for your design and desired finished size.
When cutting, center important graphics within each square. Take your time with this step—rushed cutting often leads to off-center designs that can't be corrected later.
Assembling Your Quilt Top
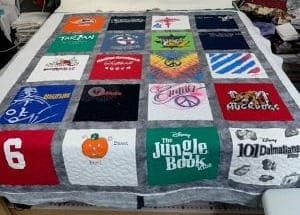
Row by Row Construction: Sew your squares together in rows first, then join the rows. This approach is more manageable than trying to handle large sections of partially assembled quilt top.
Use a Walking Foot: This specialized sewing machine foot helps feed layers evenly, preventing the stretchy t-shirt fabric from shifting or puckering during sewing².
Consistent Seam Allowances: Maintain a steady ¼-inch seam allowance throughout construction³. Consistent seams create clean lines and help your quilt lie flat.
Press Carefully: After sewing each seam, press it flat. You can press seams open or to one side—just be consistent throughout your project.
Creating the Quilt Sandwich
Once your quilt top is complete, you'll layer it with batting and backing fabric to create what quilters call a "quilt sandwich."
Choose Appropriate Batting: Cotton batting provides breathability and a natural feel, while polyester batting offers loft and warmth. Consider how you'll use the finished quilt when making this choice.
Select Coordinating Backing: Your backing fabric doesn't need to match perfectly, but it should complement your t-shirt colors. Flannel and fleece are popular choices for their softness and comfort.
Layer Carefully: Place your backing fabric face-down, add the batting, then position your quilt top face-up. Smooth each layer as you go, eliminating wrinkles and ensuring everything lies flat.
Finishing Touches: Quilting and Binding
Quilting Options
Quilting—the process of stitching through all three layers—both secures your quilt and adds visual interest. You have several options:
Straight-Line Quilting: Simple parallel lines or grids are perfect for beginners and complement busy t-shirt graphics without competing for attention.
Quilting in the Ditch: Stitching along existing seam lines is nearly invisible and provides good stability.
Professional Long-Arm Quilting: Many quilters choose to have their quilt tops professionally quilted⁴. Long-arm quilters can create intricate patterns that would be difficult to achieve on a home sewing machine.
Binding for a Professional Finish
Binding encases the raw edges of your quilt, providing both protection and a finished appearance. Cut fabric strips about 2½ inches wide, join them to create one continuous strip, then attach the binding to your quilt's perimeter.
Take time to miter corners carefully—this detail separates amateur work from professional-looking results.
Creative Variations to Make Your Quilt Unique
While traditional square layouts are beautiful, don't be afraid to experiment with creative variations:
Mixed Sizes: Combine different square sizes to accommodate varying graphic sizes or create visual interest.
Sashing and Borders: Add fabric strips between squares or around the entire quilt to frame your t-shirt designs and create breathing room.
Incorporate Other Memorabilia: Include fabric-printed photos, patches, ribbons, or other flat mementos alongside your t-shirts.
Theme-Based Organization: Group shirts by color, chronology, or theme (sports, concerts, travel) to create cohesive sections within your quilt.
Mixed Textiles: Combine t-shirts with other meaningful fabrics like flannel shirts, denim pieces, or fleece items for added texture and interest.
Essential Tips for Success
Invest in Quality Tools: Sharp rotary cutters, accurate rulers, and a reliable sewing machine make the process more enjoyable and yield better results.
Take Your Time: Rushing leads to mistakes that are difficult to correct. Enjoy the process and the memories each shirt evokes.
Document the Process: Take photos as you work and consider creating a small booklet explaining the significance of key shirts. Future generations will appreciate understanding the stories behind the quilt.
Don't Aim for Perfection: Handmade character is part of a quilt's charm. Small imperfections add personality and authenticity to your finished piece.
Your Memory Quilt Awaits
Creating a t-shirt quilt is more than a crafting project—it's an act of preservation, turning cherished memories into something tangible that can be enjoyed daily. Whether you're making one as a graduation gift, creating a memorial quilt, or simply wanting to preserve your own collection of meaningful shirts, the process itself becomes part of the story.
As you snuggle under your finished quilt, each square will transport you back to the moment that shirt entered your life. Concert lights, finish line celebrations, team victories, family gatherings—all wrapped up in comfort and warmth. That's the true magic of a t-shirt quilt: it doesn't just keep you warm; it keeps your memories alive.
Ready to start your own memory quilt? Gather those meaningful t-shirts and begin planning your unique story in fabric. Your future self will thank you for preserving these precious memories in such a beautiful, functional way.
Sources and Additional Resources
¹ "How to Make a T-Shirt Quilt: A Step-by-Step Guide." The Spruce Crafts. https://www.thesprucecrafts.com/make-a-t-shirt-quilt-2821455
² "T-Shirt Quilt Tutorial." Missouri Star Quilt Company. https://www.youtube.com/watch?v=kRj8n05uK70
³ "Beginners Guide to Making a T-Shirt Quilt." Diary of a Quilter. https://www.diaryofaquilter.com/beginners-guide-to-making-a-t-shirt-quilt/
⁴ "T-Shirt Quilts 101: Everything You Need to Know." Connecting Threads Blog. https://blog.connectingthreads.com/t-shirt-quilts-101-everything-you-need-to-know/
For Further Learning:
- YouTube Tutorials: Search for "t-shirt quilt tutorials" for visual step-by-step guides
- Local Quilt Shops: Many offer classes and workshops specifically for t-shirt quilting
- Online Quilting Communities: Join forums and social media groups to connect with other quilters and share ideas
- Quilting Books and Magazines: Look for publications that specialize in memory quilts and non-traditional quilting techniques